
How to Mount Your New Pretty Display Acrylic Jewelry Organizer
Easy step by step Instructions for Mounting Your Acrylic Jewelry Organizer on a typical wall. Here we will show you Instructions for Mounting Your Jewelry Organizer. Now your jewelry will be organized and easy to find when you need it,
and you will have a lovely display to enjoy every day!
YOUR JEWELRY ORGANIZER COMES IN THREE PARTS
- The SHELF
- The EARRING HOLDER
- The NECKLACE HOLDER
WHATS IN THE BOX
- 1 shelf + short screws
- 1 earring holder
- 1 necklace holder + back supports + long screws
- a choice of white screw anchors or red screw anchors.
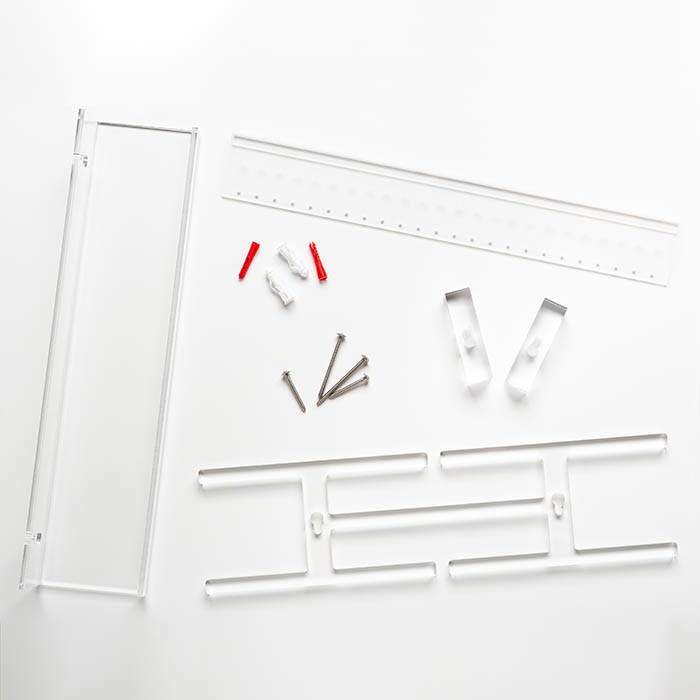
*Please note that the fittings included may not be suitable for all wall types, and you may need to purchase fittings to suit your requirements.
Quick instructions
QUICK INSTRUCTIONS FOR MOUNTING THE SHELF & EARRING HOLDER
1. DRILL THE WALL
2. INSERT SCREW ANCHORS
3. PARTIALLY INSERT SCREWS
4. INSERT SHELF ONTO SCREWS AND KEEP LEVEL WHILE THE SCREWS ARE TIGHTENED
5. HANG THE EARRING HOLDER OVER THE FRONT LIP OF THE SHELF
QUICK INSTRUCTIONS FOR MOUNTING THE NECKLACE HOLDER
1. DRILL THE WALL
2. INSERT SCREW ANCHORS
3. PARTIALLY INSERT SCREWS
4. INSERT BACK SUPPORTS ONTO SCREWS
5. INSERT NECKLACE HOLDER ONTO SCREWS IN FRONT OF THE BACK SUPPORTS
6. LINE UP BACK SUPPORTS AND MEDAL HOLDER AND KEEP LEVEL WHILE THE SCREWS ARE TIGHTENED
Detailed instructions
BEFORE YOU START:
To mount the shelf and the necklace holder we recommend you use a drill with a 5/16 inch (8mm) size drill bit if you are using the white screw holders (best for drywall) or a 7/32 inch (6mm) drill bit if using the red screw anchors (suitable for general purposes). You will also need pencil and eraser or damp cloth, a spirit level, a Phillips screwdriver and a measuring tape.
Hold the shelf and the necklace holder against the wall where you would like to mount them and make sure that they fit and that there is plenty of room for the earring holder to clip on to the shelf, and for the necklaces to hang down freely from the necklace holder. We suggest you test it with a few items on it to be certain before you start to drill.
It is very important to check that there are no water pipes or electrical cables inside the wall where you are drilling – we don’t want any accidents! If in doubt, choose somewhere else.
Press each item firmly against the wall and check that it is level and they are in line with each other on the wall. The shelf should be above the necklace holder. Hold each item steady and use the pencil to draw around the hole shapes on the wall. You will need to drill a hole to a depth a little longer than the screw anchor. It helps to mark this on the drill bit before you start, eg. with some tape. Remember the shelf uses the shorter screws and the necklace holder uses the longer screws and the back supports.
DRILLING AND THE INSERTING SCREW ANCHORS & SCREWS
Hold the drill at right angles to the wall where you marked the hole, and drill slowly at first to reduce wobble where you marked the wall. You can apply more pressure as the drill goes in. When you have drilled the two holes deep enough, rub away any remaining pencil marks and then gently push the white screw anchors in so that the rim is resting against the wall, or the red screw anchors until they are completely flush with the wall.
Remember the shelf requires the shorter screws and the necklace holder requires the longer screws plus the back supports. Screw the screws into the screw anchors so they are steady. Do not go in all the way into the wall, as you need to leave enough room to insert the shelf or the back supports and necklace holder.
MOUNTING THE SHELF & EARRING HOLDER
Put the shelf onto the screws and push it in towards the wall. Tighten the screws and continue to adjust the shelf if necessary to keep it level until the shelf is firmly in place. Simply loosen and tighten the screws again slightly if you need to make any adjustments.
Hang the earring holder over the front lip of the shelf.
MOUNTING THE NECKLACE HOLDER
Put the back supports onto the screws and push them in towards the wall. Insert the necklace holder onto the screws in front of the back supports, lining the back supports up with the vertical part of the necklace holder. Tighten the screws and continue to adjust the necklace holder to keep it level and the two back supports to keep them lined up behind the necklace holder, tightening the screws until the necklace holder is firmly in place. Simply loosen and tighten the screws again slightly if you need to make any adjustments.